Configuration
Here is the list of all configurable parameters and options of the script (in order of appearance in the script code): whether configurable through the both dialog window and source code or through editing the source code only. They could be divided on several logical groups of settings.
Note: default values of some settings may differ in script version acquired with Sample pack.
Tip: for editing the source code it's recommended to use the text editor with syntax highlighting such as Notepad++ (which I, actually, used to write this script).
Initial directory
-
Path [dialog]
Defines the working folder.
- "Y:\Your\path"
- Images in specified folder will be processed with the script.
Default value is matched with the home directory of the script. Can be set through editing the source code where it could be found after settings, that will be considered next.
Note: Photoshop CS5 has difficulties with exporting images using script to folders, path to which contains cyrillic symbols, so it's better not to have non-latin characters in path to your working directory.

General settings
-
DontAskMeAnything
Toggles "silent" mode of the script. While in "silent" mode the only question you'll be asked is the path to working directory.
- [default] false
- "Standard" mode: all input dialogs are active
- true
- "Silent" mode: most of input dialogs are suppressed, except the prompt to input working directory
Experienced users will find this option very handy: just configure the script in source code once and don't be bothered by any input boxes.
-
SuppressDialogs
Controls whether the script should suppress native Photoshop warnings (such as Color Profile Mismatch warning) or not.
- [default] false
- All error and warning messages are displayed to user
- true
- All error and warning messages (as well as other Photoshop dialog windows) are suppressed not to bother you
-
b_Folder, s_Folder
Defines the names of folders in which the output images will be stored.
For
b_Folder:- [default] "b"
- The folder with this name will be created (if not yet) according to
NestedDirsandSaveInOneFoldersettings and will contain "big" output images
For
s_Folder:- [default] "s"
- If
WorkModeset to1the folder with this name will be created (if not yet) according toNestedDirsandSaveInOneFoldersettings and will contain thumbnails
-
WorkMode [dialog]
Toggles the processing mode of the script: should it create thumbnails or not.
- 0
- Do not create thumbnails
- [default] 1
- Create thumbnails
If set to
0, directory specified ins_Foldervariable won't be created and thumbnails won't be generated, only big copies will be put inb_Folderdirectory.
-
NestedDirs [dialog]
Controls how script should process files in nested subdirectories inside initial folder.
- false
- Do not process files in subdirectories
- [default] true
- Process files in subdirectories
If set to
true, it will force script recursively dive in each and every nested directory inside initial folder (set on startup) and process every image file found there. Output will be saved in appropriate folders according toSaveInOneFoldersetting.
-
SaveInOneFolder
Controls where script should create output folders with names specified in
b_Folderands_Foldersettings. Or, in other words, should it put all output images in one and the same folder or should it create appropriate output subfolders inside every processing directory.- [default] false
- Output folders will be created inside every processing directory and will contain output images of that directory
- true
- Output folders will be created as child folders of initial directory and will contain output images from every processed directory
-
ExcludeDirsPrefix [dialog]
Directories which names start with this character sequence won't be processed (even if
NestedDirsis set totrue).- [default] "$"
- Folders with names starting with "$" (such as "$dummy_folder", "$_dummy", etc.) won't be processed and images inside this folders won't be accessed by the script

"Big" images settings
-
ResizeMode [dialog]
Specifies how "big" images should be scaled.
- 1
- Image will be resized proportionally with its widest dimension (whether width or height) downscaled to size specified in
Sizesetting - [default] 2
- Image will be resized proportionally with its height downscaled to size specified in
Sizesetting - 3
- Image will be resized proportionally with its width downscaled to size specified in
Sizesetting
If according source image's dimension lower than
Sizethan resizing won't occur.
-
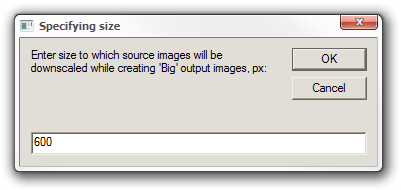
Size [dialog]
Size to which source images will be scaled according to
ResizeModesetting.- [default] 600
- Dimension in pixels
-
LogoFile [dialog]
Filename of image (watermark) which should be pasted above the source image (at the position specified in
Positionsetting) while generating "big" output image.- [default] "logo.png"
- Image with specified filename will be pasted above the source image
- ""
- Nothing will be pasted above the source image
Logo image should be placed in the home directory of the script. If logo image with specified filename can't be found and
DontAskMeAnythingis set tofalsewarning message will be popped up and user will be asked to re-enter filename of the logo image.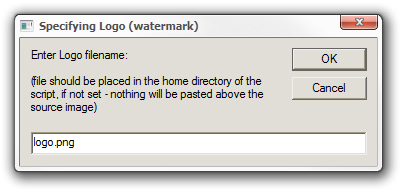
-
Position [dialog]
Position on the source image at which logo (specified in
LogoFilesetting) will be pasted while generating "big" output image.- 0
- Center of source image
- 1
- Right-bottom corner
- [default] 2
- Left-bottom corner
- 3
- Left-top corner
- 4
- Right-top corner
- 5
- Center-bottom
If logo image wider than source image and
Positionis set to5(center-bottom) it will be centered horizontally and cropped.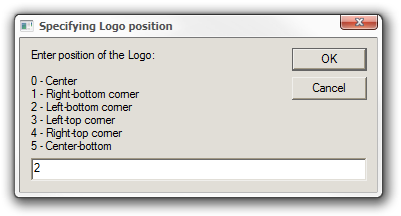
-
Opacity
Opacity of the pasted logo.
- [default] 100
- Pasted logo is completely opaque
Tip: as long as you supply as logo an image with alpha channel you can make it semi-transparent itself with no need to change
Opacitysetting. -
oDx, oDy
Shift of the logo from the source image's bounds.
For
oDx:- [default] 8
- Horizontal shift in pixels
For
oDy:- [default] 8
- Vertical shift in pixels
Thumbnail settings
-
ThumbDifferent [dialog]
Toggles using different sizes for thumbnails based on aspect ratio (AR = height/width) of the source image.
- [default] false
- All thumbnails have the same sizes specified in
ThumbWidthandThumbHeightsettings - true
- Thumbnails of images with AR > 1 have sizes
ThumbWidthandThumbHeight; with AR <= 1 have sizesThumbWidth_HorizandThumbHeight_Horiz
You may find this setting useful for arranging some sorts of web-gallerie, e.g. certificates or diplomas gallery.

-
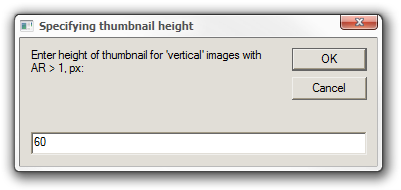
ThumbWidth [dialog] , ThumbHeight [dialog]
Defines the width and height of thumbnails. If
ThumbDifferentis set totrue- width and heigth of thumbnails of images with AR > 1 only.For
ThumbWidth:- [default] 60
- Width of thumbnail in pixels


For
ThumbHeight:- [default] 60
- Height of thumbnail in pixels

-
ThumbWidth_Horiz [dialog] , ThumbHeight_Horiz [dialog]
Defines the width and height of thumbnails of images with AR <= 1. Works if
ThumbDifferentis set totrue.For
ThumbWidth_Horiz:- [default] 140
- Width of thumbnail in pixels

For
ThumbHeight_Horiz:- [default] 60
- Height of thumbnail in pixels

-
ThumbWideMost
Defines the way script should cut thumbnails off from the source image.
- false
- Thumbnail will be cut off from the source image preserving the original scale
- [default] true
- The source image will be properly scaled to fit the dimensions of thumbnail
If set to
true, in fact, it is the bounding box of thumbnail that is upscaled to fit the source image, then cropped and downscaled back to desired thumbnail size (specified inThumbWidth,ThumbHeight,ThumbWidth_HorizandThumbHeight_Horizsettings). -
ThumbScaleFactor [dialog]
Defines the indent of thumbnail from the edges of bounding box of the source image. Works if
ThumbWideMostis set totrue.- [default] 5
- Indent from the edges of the source image in percentage
This option may be very useful in the case when the source image has the frame (or copyright notice) itself and you don't want the parts of it to be visible on thumbnail.

-
ThumbDy [dialog]
Defines the vertical indent of thumbnail from the top edge of image.
- [default] -1
- No vertical indent is applied, thumbnail is cut off from the center of the source image
- xx
- Indent from the top edge of the source image: if
ThumbWideMostis set totrue- in percentage (of the vertical dimension of image), ifThumbWideMostis set tofalse- in pixels
This option may be very useful for portrait photos if you don't want any cut off faces on your thumbnails: just make thumbnails generating from the top of image, not from the center of it.
Note: if
ThumbWideMostis set totruethe percentage value of theThumbDyindent is applied to both source image area and the thumbnail area itself. It means that value of0(percent) place the top of the thumbnail's bounding box in the top of source image's bounding box, value of50(percent) place the center of the thumbnail's bounding box in the center of source image's bounding box, value of100(percent) place the bottom of the thumbnail's bounding box in the bottom of source image's bounding box, etc.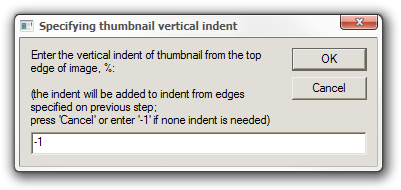
-
FrameFile [dialog]
Filename of image which should be pasted above thumbnail (in order to make a frame). If
ThumbDifferentis set totrue- frame for thumbnails of images with AR > 1 only.- "frame.png"
- Image with specified filename will be pasted above the thumbnail of source image
- [default] ""
- Nothing will be pasted above the thumbnail
Frame image should be placed in the home directory of the script. If frame image with specified filename can't be found and
DontAskMeAnythingis set tofalsewarning message will be popped up and user will be asked to re-enter filename of the frame image.

-
FrameFile_Horiz [dialog]
Filename of image which should be pasted above thumbnail of image with AR <= 1. Works if
ThumbDifferentis set totrue.- "frame_horiz.png"
- Image with specified filename will be pasted above the thumbnail of source image
- [default] ""
- Nothing will be pasted above the thumbnail
Frame image should be placed in the home directory of the script. If frame image with specified filename can't be found and
DontAskMeAnythingis set tofalsewarning message will be popped up and user will be asked to re-enter filename of the frame image.
Quality settings
-
ResizeInterpolationB, ResizeInterpolationS
Defines the resampling method used for scaling while generating "big" images (
ResizeInterpolationB) and thumbnails (ResizeInterpolationS).- 1
- No resampling
- 2
- Nearest Neighbor
- 3
- Bilinear
- [default] 4
- Bicubic (default for
ResizeInterpolationB) - [default] 5
- Bicubic Sharper (default for
ResizeInterpolationS) - 6
- Bicubic Smoother
-
SharpenB, SharpenS
Toggles the sharpening of resulting images: "big" ones (
SharpenB) and thumbnails (SharpenS).- false
- Don't apply sharpening
- [default] true
- Apply sharpening using Unsharp Mask Filter (with settings defined in following parameters)
-
SharpenB_USM_Amount,
SharpenB_USM_Radius,
SharpenB_USM_ThresholdUnsharp Mask Filter settings used for sharpening "big" output images while
SharpenBis set totrue.For
SharpenB_USM_Amount:- [default] 30
- Amount, determines "how much to increase the contrast of pixels". Takes values 1-500.
For
SharpenB_USM_Radius:- [default] 0.5
- Radius, determines "the number of pixels surrounding the edge pixels that affect the sharpening. The greater the radius value, the wider the edge effects. And the wider the edge effects, the more obvious the sharpening." Takes values 0.1-250.0.
For
SharpenB_USM_Threshold:- [default] 0
- Threshold, determines "how different the sharpened pixels must be from the surrounding area before they are considered edge pixels and sharpened by the filter. For instance, a threshold of 4 affects all pixels that have tonal values that differ by a value of 4 or more, on a scale of 0 to 255. The default Threshold value (0) sharpens all pixels in the image." Takes values 0-255.
This is the same settings you may find in Unsharp Mask Filter dialog in Photoshop.
-
SharpenS_USM_Amount,
SharpenS_USM_Radius,
SharpenS_USM_ThresholdUnsharp Mask Filter settings used for sharpening thumbnails while
SharpenSis set totrue.For
SharpenS_USM_Amount:- [default] 50
- Amount (for description see previous section).
For
SharpenS_USM_Radius:- [default] 1.0
- Radius (for description see previous section).
For
SharpenS_USM_Threshold:- [default] 0
- Threshold (for description see previous section).
This is the same settings you may find in Unsharp Mask Filter dialog in Photoshop.
Output settings
-
DeleteOriginals
Controls whether the script should delete the original image file after processing it.
- [default] false
- Don't delete original files
- true
- Delete original file
-
SaveOptimized
Controls whether the script should optimize output images before saving or not.
- false
- Save without optimization
- [default] true
- Save optimized
Note: if set to
truePhotoshop will perform export to JPEG format with quality settings defined inOptimizeQualityparameter. -
OptimizeQuality
Defines the quality the output images will be saved with. Works if
SaveOptimizedis set totrue.- [default] 55
- Number in range 1 (lowest quality, smaller size) to 100 (highest quality, bigger size)
Note: that is the same quality setting you can find in Photoshop's "Save for Web & Devices..." dialog.
-
LowerCase
Controls whether the script should convert all initial filenames to lowercase before saving.
- false
- Save without lowercase transformation (leave it as it were)
- [default] true
- Convert filenames to lowercase
-
Rename
Controls whether the script should rename output files when saving. Renaming includes adding counter value and, optionally, suffix and prefix.
- false
- Don't rename output files
- [default] true
- Rename output files according to settings that follows
Very useful option for arranging list of your images in ordered maner like "picture-01.jpg", "picture-02.jpg", etc.
Note: if set to
falseandSaveInOneFolderis set totrue, output files with the same names will be overwriting each other in order of script processing them in queue. -
RenamePrefix
Defines the string that adds to original filename as prefix. Works if
Renameis set totrue.- [default] "g"
- Output files will be saved as "g01.jpg", "g02.jpg", etc. (according to following settings)
-
RenameSuffixS
Defines the string that adds to thumbnail filename as suffix.
- [default] "g"
- Filenames will be converted from "SourceFilename" to "gSourceFilename" (or to "gsourcefilename" if
LowerCaseis ste totrue)
Note: works regardless of
Renamesetting (whether it is set totrueorfalse) and applies for thumbnails only. -
Digits
Defines the number of digits in counter used in renaming of output files.
- [default] 2
- This defines the counter with values like 01, 02, ..., 98, 99, 100. If set to
3(for example) it will produce numbers like 001, 002, ..., 098, 099, 100.
Why whould you like the naming of files like that? Well, for purposes of sorting them in your file manager to begin with. Then, it can help you in a way to maintain the pattern for your web-gallery.
-
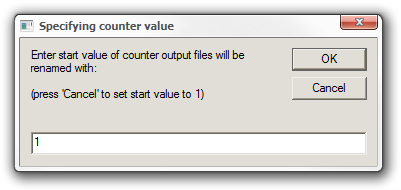
CounterStartValue [dialog]
Defines the start value of counter used in renaming of output files.
- [default] 1
- The counetr will start with value "1", "01", "001", etc. (according to
Digitsvalue)
Just in case you need to populate your existing gallery with new pictures and you want to preseve the order.
After-party settings
-
Quit
Controls whether the script should close Photoshop after performing its task or not.
- [default] false
- Don't close Photoshop
- true
- Close Photoshop after script completes
Note: if set to
trueand there is another not saved document opened in Photoshop you'll be normally asked the standard "Save Changes" dialog.